What Is 3D Interior Rendering? A Complete Guide for Designers
Visualize interiors before they’re built.
6 MIN READ
June 24, 2025

Written By
Rahimudeen M
That’s where 3D interior rendering changes everything.
Instead of hoping a client "gets it" from a floor plan or mood board, you show them the actual space. How the light hits the couch in the morning. How the textures bounce off the wall. How that bold blue accent chair suddenly makes sense. It’s not just a drawing anymore. It feels real.
This guide breaks down what 3D interior rendering is, how it actually works, and why more and more designers are using it as their not-so-secret weapon from client pitches to final approvals.
Understanding the Basics of 3D Interior Rendering
Before we get into tools and techniques, let’s strip this back to the basics. What exactly is 3D interior rendering and why is it showing up in every designer’s workflow?
A Simple Definition, Made for Designers
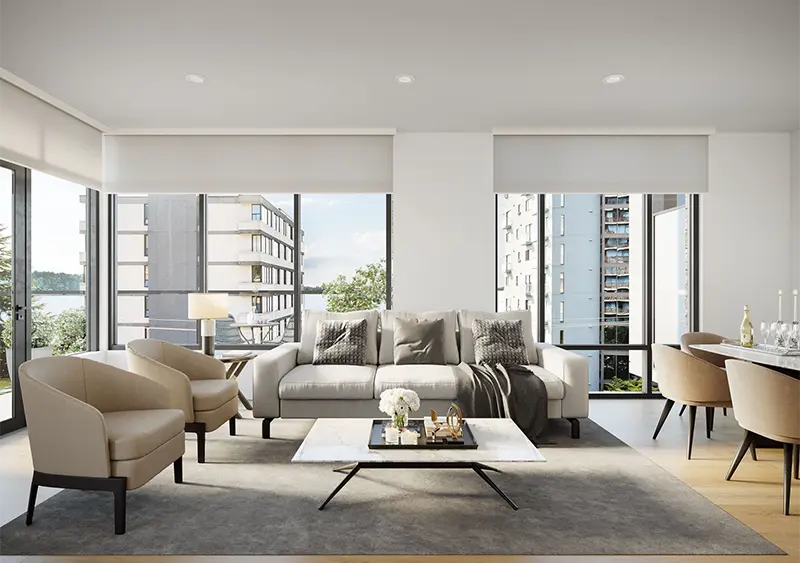
“3D interior rendering is the process of turning your design ideas into visuals that look like real photos before anything is built.”
You take your floor plans, furniture choices, lighting moods, material palettes, and use 3D software to bring them to life as photorealistic images. Clients don’t have to imagine anymore. They can see it. Feel it. Experience it.
Types of 3D Interior Renders
- Still Renders
- 360° Interior Views
- Virtual 3d Walkthroughs
- AR/VR-enabled Previews
How the 3D Interior Rendering Process Works?
If you’ve ever wondered how designers go from a rough sketch to a hyper-realistic interior image that looks like it’s been photographed, this is it. The 3D interior rendering process isn’t a single click. It’s a layered, thoughtful workflow that mirrors how designers think and build in the real world.
Let’s break it down step by step.
Step 1: Concept and Reference Gathering
Every great render starts long before the software even opens. This stage is about defining the vision. Designers pull together moodboards, inspiration images, floorplans, hand sketches, and physical samples like wood finishes or fabric swatches. This isn’t just for visuals, it's about understanding the mood, purpose, and context of the space.
Are we designing a cozy, plant-filled studio apartment? Or a sleek, corporate waiting lounge? The vibe shapes every decision that comes after.
You’re basically creating the creative blueprint that guides the entire rendering process.
Want to see how this process works specifically for furniture-focused interiors? Check out our blog on 3D furniture rendering for interior designers for real-world examples and workflow tips.
Step 2: 3D Modeling the Space
Once the concept is locked, it’s time to start building digitally. This step involves creating the actual 3D structure of the space using modeling tools like SketchUp, 3ds Max, Revit, or Blender. Walls, windows, doors, ceiling heights, and room volumes are all shaped in this phase.
Think of this as constructing a digital version of your floor plan. Every element needs to be proportionally accurate, because the realism of the final render depends on the foundation being structurally sound.
For larger projects or architectural workflows, BIM-based software like Revit is often used. For flexible, detailed modeling, 3ds Max or Blender are common picks among freelancers and studios.
Step 3: Adding Materials, Textures, and Lighting
This is where the space starts to feel alive.
Designers begin assigning surface materials to every object in the scene from polished concrete floors to velvet headboards. High-resolution texture maps are applied to simulate real-world details like fabric grain, wall paint, or glossy tiles.
Then comes the lighting. And it’s more than just turning on a lamp.
You simulate natural daylight through windows, bounce interior lights off reflective surfaces, and use shadow mapping to mimic the way light interacts with depth and volume. This step can completely change the feel of a render warm and inviting, or sharp and modern, just through light and color.
Every decision here from rug texture to light temperature contributes to how believable the final scene looks.
Step 4: Rendering and Post-Production
Now it’s time to hit render but that doesn’t mean the work is done.
This step involves using a rendering engine like V-Ray, Lumion, Corona Renderer, or Enscape to process all the 3D data into a realistic image. These engines simulate how light behaves in real life, calculating reflections, shadows, ambient occlusion, and even refraction for transparent surfaces.
Depending on the complexity of the scene, rendering can take anywhere from a few minutes to several hours.
Once the image is generated, most designers bring it into Photoshop or similar software for post-production. This is where you fine-tune brightness, contrast, depth of field, and color grading. You might also add background elements through compositing like trees outside a window or slight lens blur for realism.
The goal is simple: polish the visual until it not only looks good, but feels real.
Popular Software for 3D Interior Rendering
The right software can make or break your rendering workflow. Some tools are great for fast, flexible mockups, while others are built for ultra-realistic visuals that feel like finished photographs. Here’s a look at the most popular choices interior designers are using today each with its own strength depending on your project style and technical comfort.
SketchUp + V-Ray
SketchUp is often the first 3D tool many designers fall in love with. It’s easy to learn, intuitive to navigate, and perfect for blocking out interior spaces quickly. Paired with V-Ray, it becomes a powerful combo allowing you to take those basic models and render them with realistic lighting, reflections, and materials.
It’s especially popular for residential interiors and small-to-midscale commercial work, where speed and visual clarity matter more than ultra-fine detail.
Autodesk 3ds Max
This is the heavyweight in the room. 3ds Max is widely used in architecture, product design, and interior visualization studios that need high-end, photoreal renders. It offers total control over every object, material, and camera setting but it also comes with a steep learning curve.
Designers who want complete freedom in scene creation and work with complex lighting or animation tend to favor this platform. Pair it with rendering engines like V-Ray or Corona, and the results can look indistinguishable from real photos.
Blender (Free)
Blender is the go-to choice for tech-savvy designers who want professional capabilities without the price tag. It’s completely free and open-source, yet powerful enough to handle complex interiors, detailed textures, and cinematic lighting setups.
The catch? It’s not beginner-friendly. You’ll need time to learn the interface and build your workflow. But once you get the hang of it, Blender becomes an incredibly flexible space for experimentation, especially for designers who enjoy pushing creative boundaries.
Curious how these tools stack up in real-world workflows? Check out our full breakdown of the best 3D rendering tools for interior designers in 2025 to find the right fit for your design style and project needs.
How to Create Stunning Renders: Pro Tips?
Creating a render isn’t just about pressing a button. It’s about storytelling. The difference between a basic render and a breathtaking one often lies in the small decisions of light placement, texture choice, camera angle. Here’s what seasoned interior designers and 3D artists pay attention to when crafting truly standout visuals.
1. Start With a Clear Concept, Not Just a Floor Plan
Before you open your software, understand the feeling you want the space to convey. Is it a warm reading nook? A dramatic lobby? A playful kids’ room? The concept should drive everything from material choices to lighting mood. Great renders don't just show a space; they tell a story.
2. Use Real-World References for Materials
Photorealism comes from accuracy. Don’t guess how a velvet sofa reflects light or how walnut grain behaves in shadows. Use photo references or scan real-world materials whenever possible. Pay attention to scale and roughness in your textures. A perfectly modeled chair can still fall flat if the fabric looks plastic.
3. Balance Natural and Artificial Lighting
Lighting makes or breaks a render. A good tip is to start with natural daylight, simulate sunlight coming through the windows then layer in artificial lighting to highlight specific zones or add warmth. Use soft shadows, indirect bounces, and avoid harsh contrast unless it's intentional.
Tools like V-Ray and Enscape offer real-world lighting presets, but the magic comes from manual fine-tuning.
4. Choose Camera Angles Like a Photographer
Renders should feel like they were captured through a camera lens. Use focal length, depth of field, and eye-level angles to make the space feel real. Avoid wide shots that distort the room or angles that feel too engineered.
A great rule: If you wouldn’t take that photo in real life, don’t use it in a render.
5. Add Imperfections to Make It Real
Perfection feels fake. Slightly wrinkled cushions, small floor scuffs, or a chair slightly out of place make a render more believable. These “flaws” mimic how real spaces exist lived-in, not showroom-clean.
Some artists even add fingerprint smudges on glossy surfaces or subtle dust in corners to enhance realism.
6. Post-Production Is Where the Mood Comes Alive
Even after rendering, the image isn’t done. Bring it into Photoshop or Lightroom to adjust lighting curves, color tone, contrast, and sharpness. This is where you push the image closer to the emotion you're aiming for, bright, cinematic, or editorial.
Avoid over-editing. The best post-production enhances, not hides.
7. Don’t Rush. Rendering Takes Time
High-quality renders require patience. Let the engine do its job, especially if you’re using ray tracing or global illumination. Rushed renders often have grainy shadows, flat reflections, or missing detail.
If possible, let it run overnight and check it fresh in the morning. A rested eye can spot small tweaks that make a big impact.
Is 3D Interior Rendering Worth It for Designers?
If you’re wondering whether 3D interior rendering is worth the effort, the short answer is yes but it depends on how you use it. Like any tool, it takes time to learn, but the return on that time is often felt quickly, especially when working with clients.
Here’s how the trade-offs compare:

The bottom line? What you invest in time and learning up front, you gain back in client trust, project clarity, and presentation quality.
Learn more in our guide on why photorealistic 3D rendering is essential for interior designers, where we break down how lifelike visuals influence client decisions.
Final Thoughts
You can have the best taste in the room. The perfect layout. The right blend of texture, tone, and light. But if your client can’t see it, the magic stays locked in your head.
That’s what 3D interior rendering service unlocks. It’s not just a service, it’s a translator. It takes your vision and turns it into something others can feel, connect with, and say yes to.
And no, you don’t need to be a tech wizard to get started. You just need the curiosity to learn, the patience to experiment, and the confidence to push your design process forward. Because the future of interior design isn’t flat it’s dimensional
Ready to turn sketches into something clients can actually feel? Explore how Zealous India can help bring your interior designs to life with photorealistic 3D visuals that speak louder than words.
About the writer :
Rahimudeen M is the Senior Operations Manager at Zealous Services, with over 17 years of experience in project ... management and client success. He ensures smooth operations across 3D visualization, animation, and modeling projects. A natural leader, Rahimudeen is passionate about building high-performing teams and delivering top-tier results for clients across global markets.
Read MoreFrequently Asked Questions (FAQ)
What’s the difference between 3D interior rendering and 2D floor plans?
A 2D floor plan shows layout and measurements. A 3D render adds depth, lighting, materials, and perspective making it feel like you're standing inside the space, not just looking at it from above.
Do I need technical skills to start with 3D rendering?
Not necessarily. Tools like SketchUp or Enscape are beginner-friendly. Others like Blender or 3ds Max have steeper learning curves, but with tutorials and practice, most designers can pick them up over time.
How long does it take to create a professional render?
Simple renders can be done in a few hours. More detailed, photorealistic scenes with textures, lighting, and post-production can take several days, especially for large interiors.
Is 3D rendering only for luxury projects or big firms?
Not at all. Freelancers, small studios, and independent designers use 3D rendering every day. It helps pitch ideas, win client trust, and speed up decision-making no matter the budget.
Can 3D interior rendering be used for virtual staging or e-commerce?
Yes. Many designers use it for virtual furniture staging, product previews, and interactive walkthroughs. It’s especially popular for real estate listings and furniture brands with digital showrooms.